1 - CAPTURE THE TOWN

PROLOGUE
At the very beginning, american paratroopers are launched by three planes (but one usually is taken down before delivering its load) in the middle of the map, and they head south to get hold of five long range guns and their respective transports. During the attack, three other planes arrive and launch other paratroopers (and usually another one falls to AA fire), and and when all enemies are wiped out, the last three arrive with more paratroopers that normally reach the ground safely. Sometimes a gun is lost in the process due to long range enemy fire. The player cannot control the units until the third wave arrive.
 |
| Sixteen German soldiers, five howitzers, four Maultier trucks and five transports (on the right) are the first objective. |
 |
| American paratroopers are launched just north of the enemy howitzers. |
 |
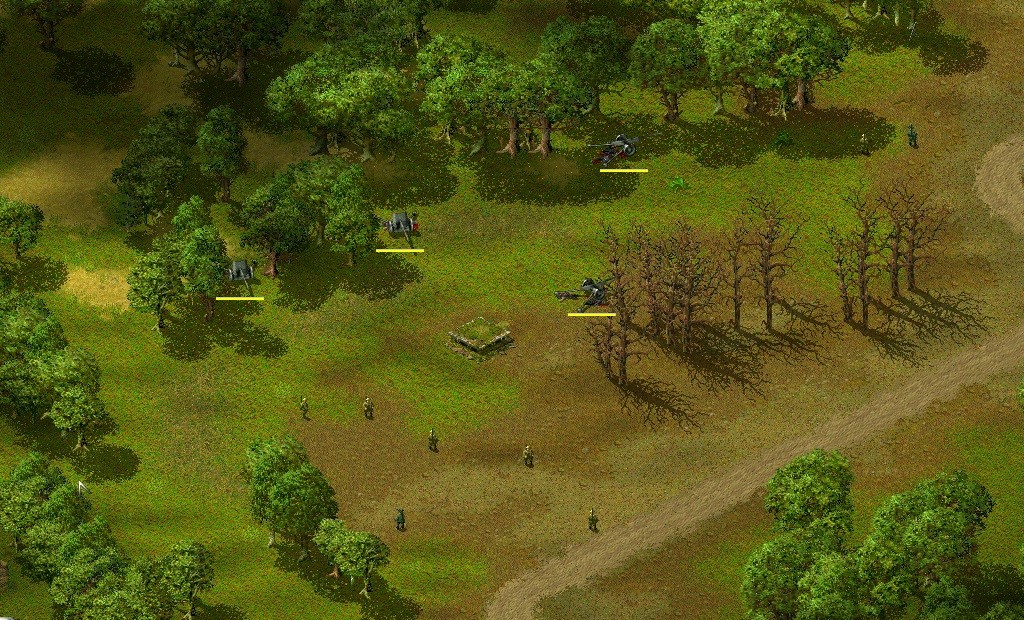
| Once landed, American soldiers head South towards the enemy. Some of them, on the right, exchange fire with German soldiers in the near village. Their lifeline is yellow, the player cannot control them. |
 |
| The attack begins. Losses are heavy, as German howitzers nearby fire on incoming soldiers. |
 |
| American soldiers have captured the five howitzers but their lifelines are still yellow, they are not controlled by the player. |
When the last paratroopers touch ground, enemy infantry units arrive from north east, so all units can move to the south-east map border, to regroup and plan next move.
 |
| American and English soldiers regroup along the South-East border of the map, in a safe place. |
In the meantime, English units have arrived in the far west corner of the map, where main base is located.
 |
| English units arrive piecemeal at rally point. |
LINKING THE TWO GROUPS
While waiting for the other units to arrive, the two groups can link, as one has field guns and snipers but no Supply Trucks, and the other one has Jimmies, tanks, Supply Trucks and so on. Two riflemen move along the south-west border to shoot at the blindage on the river where a bridge can be built. When the enemy units are wiped out, a Supply Truck builds a bridge across the river. After the bridge is completed, a fast unit crosses the river and clears the area, as in a matter of seconds usually three enemy bombers will come and destroy part of the bridge. When they have left, the Supply Truck repairs the bridge.
While waiting for the other units to arrive, the two groups can link, as one has field guns and snipers but no Supply Trucks, and the other one has Jimmies, tanks, Supply Trucks and so on. Two riflemen move along the south-west border to shoot at the blindage on the river where a bridge can be built. When the enemy units are wiped out, a Supply Truck builds a bridge across the river. After the bridge is completed, a fast unit crosses the river and clears the area, as in a matter of seconds usually three enemy bombers will come and destroy part of the bridge. When they have left, the Supply Truck repairs the bridge.
 |
| The two soldiers have shot the bunker, the Supply Truck has been built the bridge , the German bombers have come and destroyed the bunker and the bridge, the Supply Truck has repaired the damage. |
CLEAR THE BRIDGE
The goal is to capture the town, but the fun is indeed to kill every enemy on the map, so let's leave the town for the showdown and start the fireworks. The big wooden bridge in front of main base is in fact very dangerous, as it's crammed with mines, but taking them out is a problem, as enemy units are lurking in the trees and waiting to shoot at infantry doing the job. So a Jimmy can go get the snipers that came down with the paratroopers, and bring them to the scene. The snipers preceded by riflemen acting as shield, proceed very carefully on the bridge, swipe the mines, shoot the bunker and kill all enemy units in the trees on the right, supported by the little field guns that are deadly with infantry. Then they close in on the four AT guns to the north, from south and from east.
 |
| To the East of the bridge, fifteen German soldiers are hidden in the trees. |
 |
| To the North of the bridge, four AT guns and eight German soldiers plus an unknown number in the bunker. |
 |
| Bridge has been cleared, all 31 enemy soldiers have been killed, some English rifleman has been wounded but the nearness of the Mobile Hospital has saved his life. |
NORTH-WEST VILLAGE
Along the north-west map edge, there's a tiny village, and twentysix enemies are hidden inside the seven houses but there are no guns or tanks. A couple of Jimmies pass through the place shooting to the enemies in the houses. When the enemy Panzerfaust units have finished ammunition, a tank moves to the crossroads, and when the Jimmies passing reveal the men hidden the houses, the tank kills them. While the village is attacked, enemy bombers will destroy the bridge on the right that leads into the major town. When English soldiers enter the town, another bomber will come in and tear down the two buildings on the right, so all units must be ready to clear the place to avoid losses. When everything is over, four friendly tanks and two troop transports will enter from the map border.
 |
| Jimmies pass through the village, enemy troopers fire Panzerfaust from inside the houses |
 |
| The place is clear, four tanks and two transport trucks have entered the map. |
NORTH VILLAGE
Proceeding to the north, there's another town, with a little hill on the right and a cliff on the left. The snipers advance and clear the left cliff where a heavy machine gun and an AT gun are, then from there they kill the enemies on the little hill, where another heavy machine gun and an AT gun are. Once the way to the town is free, the snipers and a tank move on the little hill, where they can benefit of a vantage point, and tear down the houses from there. But there are three mortars behind town center, so an "improved" Jimmy rushes along the north-west map border, to kill the soldiers managing the mortars. When the enemy runs out of ammunition for Panzerfaust, a tank moves to the crossroads and kills the remaining soldiers in the houses.
 |
North village before the attack: the mortars are out of the picture to the North. |
SOUTH VILLAGE
 |
| The South Village: AA guns, two mortars, tanks and infantry men. |
LAUNCH SITE 1
Near the launch site at the beginning of the scenario, about twenty enemy infantry units are hanging around. Snipers or a fast Jimmy can wipe them out.
EAST VILLAGE
Now it's time to take the east village. It's very big, but poorly defended. There are some infantry units in the houses in the west corner, with some panzerfaust and two AT guns, and a couple of infantry units in the rest of the village. Some tank and infantry can do the task, or reveal enemies with a Jimmy then destroy the infected houses with field guns or mortars.
NORTH EAST VILLAGE
The north east village is smaller but tougher, with tanks, AT guns, AA guns and infantry. Simplest thing is to burn every single house down with field guns, then enter carefully with a line of tanks and some sniper to assure visibility, and kill any remaining unit.
LAUNCH SITE 2
In the meantime other infantry units have retaken the launch site area. This is a sniper job.
PLATEAU
There's a plateau to the north, just in front of the bridge, and it's filled with enemies. Heavy bombing can be the best solution, but somebody will probably remain alive. Kill him.
THE TOWN
It's advisable to advance from the north, where many enemy units are. First, bomb the centre of the town where the germans keep two field guns that can be very dangerous. With a line of a dozen tanks supported by snipers, annihilate everything in front of you: enemies, houses, trees (to have a better line of sight). Bomb the town, destroy every house, then take a fast Willy and rush on the outskirts to locate remaining AT guns (there are three in the trees on the east side). When the outskirts are secure, rush through the centre and kill any remaining unit.
SCORE: 102700
Units destroyed:
infantry 526
tanks 26
artillery 66
vehicles 24
Units lost:
infantry 13
tanks 1
vehicles 1
planes 3
Nessun commento:
Posta un commento