PROLOGUE
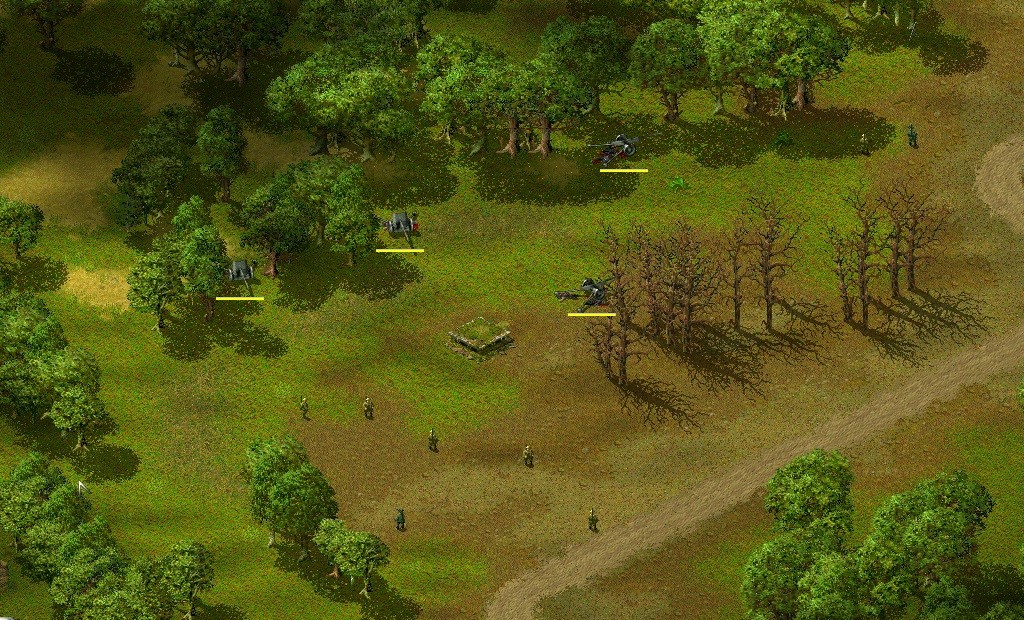
Well, this is really tough. Three armies: the main one is in the west corner, another one in the north corner and the third in the east corner. No tanks, no Willies, no field guns and, except for the western one, no supplies. Three armies, three traps. The first one, at the very beginning, is on the western army: as soon as the scenario is loaded, press the <PAUSE> button, go to the western corner, select the six trucks closer to the enemy and move them away from the units hidden in the woods, otherwise you'll lose them. It's a matter of seconds, so do it quick! The second one is subtle: as soon as you move a unit in the northern army towards the friendly units in the town to the east OR these units shoot to any german unit, tanks and infantry will attack and wipe out any unit along the north-east map edge. But you can move, shoot or advance with any unit in the east army, and that's the point. The third trap, menacing the east army, is that at a certain point enemy paratroopers will be launched on the eastern town, to take control of it. So, clear downtown leaving no unit, place spotters in the key houses and wait.
venerdì 22 giugno 2012
lunedì 28 maggio 2012
ALLIED CAMPAIGN 06 - BRITISH FIST
PROLOGUE
Fast and experienced units are needed so better to set up a training camp and upgrade at least a Willy and a GMC Jimmy Truck. The field guns are needed to win the scenario, and you can find them in the big town with the railway or in the smaller north-east town. Let's try the second option.
THE PLATEAU
First thing is to capture the plateau just to the east of our units, from where to attack the north east town. Take the snipers and clear the two towers on the reef, then wipe out the enemy units that will go after you as they catch a glimpse. Mount the snipers on the fast Willy and rush to the blindage near the trees, an area free from enemies. Dismount the snipers and kill everyone on the plateau starting with the other tower and the blindage. Occupy the three towers and the blindage.
BUNKERS AREA
Taking the north area where the bunkers are is a time consuming and dangerous process, as you must face many enemy units including mortars, snipers, AT guns and infantry moving here and there. Take the snipers and cautiously cross the bridge, then take a Willy you've trained in the meanwhile with two heavy and two sub machine gunners and rush along the line of the bunkers, killing the infantry moving in that area. And now comes the hard part: on the first little hill near the bridge there are two mortars and an AT Gun, rush at full speed and kill everybody, trying to avoid the deadly AT Gun. On the second hill, three mortars, two snipers and other units, make a second rush and keep moving, to avoid the fire from the field guns. When the two hills are enemy free, kill all the infantry moving around the bunkers, and then occupy them with snipers in no-fire mode to achieve sight. And now time to have fun.
NORTH EAST TOWN OUTSKIRTS
This is a long but rewarding battle. The northern outskirts of the town are filled with AT guns, mortars and any kind of tanks patrolling the area, so fast tanks are needed. Upgrade four Chaffee up to 600/800 experience and taking advantage of snipers' superior sight range strike hard as any enemy tank comes at range, being careful to rush away as the tanks explode, as enemy infantry inside will spot our units and long range fire will come in just a few seconds. Any other tactic would be suicide, as enemy fire power is overwhelming. The process will take a long time, as many tanks are patrolling the area. When the traffic will be non-existent, fix some routes along which Willies will be rushing by and destroy AT guns and mortars. Once the area is cleared, bomb and destroy every house in the north corner, and being very careful, capture the first two field guns at hand, as the third is guarded by enemy units. Using the field guns, destroy the remaining houses, then take a Willy and rush along the north east border, wiping out enemy units there, and bombing AT guns and mortars you spot. Other rushes in the town main street and along the south edge will clear resistance.
EAST PLATEAU
Next move is to take the plateau just east of the railway station. This is a tough task, as it's filled with AT guns, mortars and AA guns, and a dense forest blocks line of sight. Take a sub machine gunner (life 120) to absorb any shots, place an experienced sniper just behind and a Chaffee to chop the trees and advance very carefully from the south east entrance. A fast Willy could be useful to save the life of the infantry units should they be wounded. Place the field guns on the free plateau just to the east to aid in killing the enemy. Once the plateau is taken, from this vantage point wipe out the enemy units lurking in the trees just to the north, and secure the area as several units are scattered along the river bank.
AMMUNITION DEPOT
The towers around the ammunition depot to the south west are free, but be very careful as mines are laid along its perimeter, so take a squad and take them out. Occupy the towers with the snipers and let them shoot to the infantry units patrolling on the railways. Take the field guns captured in the north east town (there are eight of them but two could easily be destroyed as they very near the last house to the north east) and bomb every building in range, starting with the fuel depots at the end of the railway. Next objective is the tower to the north, which is very near to an AT gun and a machine gun, so it's a delicate task to be solved with a fast Willy.
ENEMY REINFORCEMENTS
At one point (I don't know what triggers them), many infantry reinforcements will enter from the south east border, and head to the railway station. Place the snipers on the towers to the "don't shoot" position, otherwise they will be killed. Some of these units will try to climb the north tower, so patrol the area with a Willy and kill everybody in the area. Place snipers on the plateau and they will have work to do. A flock of Willies rushing through enemy lines is much fun, but it's dangerous.
WEST TOWERS
When the tide has passed, it's time to take the west towers. The enemy in the meanwhile should have run out of ammunitions for the field guns, so take some snipers to shoot to the towers, then to the bunkers and then with a Willy wipe out the AT guns and the machine guns nearby.
CAPTURED REINFORCEMENTS
Just near the south east border there are some tanks and field guns waiting to be activated by our arrival. If enemy field guns and mortars are out of order, these units can be quietly activated, but in a matter of seconds enemy bombers will come in and deliver a deadly load of bombs, so as soon as they're activated, move them away (be careful especially with field guns).
THE STATION
Take a Willy and rush through the destroyed buildings, bombing any remaining unit.
SCORE: 187150
Units destroyed:
infantry 838
tanks 30
artillery 128
vehicles 15
Units lost:
infantry 7
tanks 0
artillery 0
vehicles 2
domenica 13 maggio 2012
ALLIED CAMPAIGN 05 - BRITAIN
OBJECTIVES:
1 - CAPTURE THE TOWN
PROLOGUE
At the very beginning, american paratroopers are launched by three planes (but one usually is taken down before delivering its load) in the middle of the map, and they head south to get hold of five long range guns and their respective transports. During the attack, three other planes arrive and launch other paratroopers (and usually another one falls to AA fire), and and when all enemies are wiped out, the last three arrive with more paratroopers that normally reach the ground safely. Sometimes a gun is lost in the process due to long range enemy fire. The player cannot control the units until the third wave arrive.
CLEAR THE BRIDGE
NORTH-WEST VILLAGE
Along the north-west map edge, there's a tiny village, and twentysix enemies are hidden inside the seven houses but there are no guns or tanks. A couple of Jimmies pass through the place shooting to the enemies in the houses. When the enemy Panzerfaust units have finished ammunition, a tank moves to the crossroads, and when the Jimmies passing reveal the men hidden the houses, the tank kills them. While the village is attacked, enemy bombers will destroy the bridge on the right that leads into the major town. When English soldiers enter the town, another bomber will come in and tear down the two buildings on the right, so all units must be ready to clear the place to avoid losses. When everything is over, four friendly tanks and two troop transports will enter from the map border.
NORTH VILLAGE
Proceeding to the north, there's another town, with a little hill on the right and a cliff on the left. The snipers advance and clear the left cliff where a heavy machine gun and an AT gun are, then from there they kill the enemies on the little hill, where another heavy machine gun and an AT gun are. Once the way to the town is free, the snipers and a tank move on the little hill, where they can benefit of a vantage point, and tear down the houses from there. But there are three mortars behind town center, so an "improved" Jimmy rushes along the north-west map border, to kill the soldiers managing the mortars. When the enemy runs out of ammunition for Panzerfaust, a tank moves to the crossroads and kills the remaining soldiers in the houses.
Taking the South Village (the one with the base) is not an easy task. First there are two little hills that must be conquered, but while the snipers kill the enemies on the smallest one, or a Jimmy rushes by, some tanks arrive, and as there are defending mortars on the other hill, it's not advisable to stage a tank attack, so the snipers scout and the long guns hit. The process is time consuming and has its dangers (for the snipers), but seems the best way to deal with the problem. When the surroundings are free from enemy tanks, it's time to occupy the first hill. On the other one there's a turret, so first task for the snipers is to kill the people in it. Once the hill is cleared, units climb over it, killing the enemies on the outskirts of the village. Then the houses can be torn down. Units must pay attention to the AA guns on the right and the mortars on the left. Now there's a little hill on the north-west of the village, and it's a tough task.The field guns can bomb it but a deadly AT gun often survives and causes losses. Anyway, when it's taken, the job is done.
LAUNCH SITE 1
Near the launch site at the beginning of the scenario, about twenty enemy infantry units are hanging around. Snipers or a fast Jimmy can wipe them out.
EAST VILLAGE
Now it's time to take the east village. It's very big, but poorly defended. There are some infantry units in the houses in the west corner, with some panzerfaust and two AT guns, and a couple of infantry units in the rest of the village. Some tank and infantry can do the task, or reveal enemies with a Jimmy then destroy the infected houses with field guns or mortars.
NORTH EAST VILLAGE
The north east village is smaller but tougher, with tanks, AT guns, AA guns and infantry. Simplest thing is to burn every single house down with field guns, then enter carefully with a line of tanks and some sniper to assure visibility, and kill any remaining unit.
LAUNCH SITE 2
In the meantime other infantry units have retaken the launch site area. This is a sniper job.
PLATEAU
There's a plateau to the north, just in front of the bridge, and it's filled with enemies. Heavy bombing can be the best solution, but somebody will probably remain alive. Kill him.
THE TOWN
It's advisable to advance from the north, where many enemy units are. First, bomb the centre of the town where the germans keep two field guns that can be very dangerous. With a line of a dozen tanks supported by snipers, annihilate everything in front of you: enemies, houses, trees (to have a better line of sight). Bomb the town, destroy every house, then take a fast Willy and rush on the outskirts to locate remaining AT guns (there are three in the trees on the east side). When the outskirts are secure, rush through the centre and kill any remaining unit.
SCORE: 102700
Units destroyed:
infantry 526
tanks 26
artillery 66
vehicles 24
Units lost:
infantry 13
tanks 1
vehicles 1
planes 3
1 - CAPTURE THE TOWN
PROLOGUE
At the very beginning, american paratroopers are launched by three planes (but one usually is taken down before delivering its load) in the middle of the map, and they head south to get hold of five long range guns and their respective transports. During the attack, three other planes arrive and launch other paratroopers (and usually another one falls to AA fire), and and when all enemies are wiped out, the last three arrive with more paratroopers that normally reach the ground safely. Sometimes a gun is lost in the process due to long range enemy fire. The player cannot control the units until the third wave arrive.
 |
| Sixteen German soldiers, five howitzers, four Maultier trucks and five transports (on the right) are the first objective. |
 |
| American paratroopers are launched just north of the enemy howitzers. |
 |
| Once landed, American soldiers head South towards the enemy. Some of them, on the right, exchange fire with German soldiers in the near village. Their lifeline is yellow, the player cannot control them. |
 |
| The attack begins. Losses are heavy, as German howitzers nearby fire on incoming soldiers. |
 |
| American soldiers have captured the five howitzers but their lifelines are still yellow, they are not controlled by the player. |
When the last paratroopers touch ground, enemy infantry units arrive from north east, so all units can move to the south-east map border, to regroup and plan next move.
 |
| American and English soldiers regroup along the South-East border of the map, in a safe place. |
In the meantime, English units have arrived in the far west corner of the map, where main base is located.
 |
| English units arrive piecemeal at rally point. |
LINKING THE TWO GROUPS
While waiting for the other units to arrive, the two groups can link, as one has field guns and snipers but no Supply Trucks, and the other one has Jimmies, tanks, Supply Trucks and so on. Two riflemen move along the south-west border to shoot at the blindage on the river where a bridge can be built. When the enemy units are wiped out, a Supply Truck builds a bridge across the river. After the bridge is completed, a fast unit crosses the river and clears the area, as in a matter of seconds usually three enemy bombers will come and destroy part of the bridge. When they have left, the Supply Truck repairs the bridge.
While waiting for the other units to arrive, the two groups can link, as one has field guns and snipers but no Supply Trucks, and the other one has Jimmies, tanks, Supply Trucks and so on. Two riflemen move along the south-west border to shoot at the blindage on the river where a bridge can be built. When the enemy units are wiped out, a Supply Truck builds a bridge across the river. After the bridge is completed, a fast unit crosses the river and clears the area, as in a matter of seconds usually three enemy bombers will come and destroy part of the bridge. When they have left, the Supply Truck repairs the bridge.
 |
| The two soldiers have shot the bunker, the Supply Truck has been built the bridge , the German bombers have come and destroyed the bunker and the bridge, the Supply Truck has repaired the damage. |
CLEAR THE BRIDGE
The goal is to capture the town, but the fun is indeed to kill every enemy on the map, so let's leave the town for the showdown and start the fireworks. The big wooden bridge in front of main base is in fact very dangerous, as it's crammed with mines, but taking them out is a problem, as enemy units are lurking in the trees and waiting to shoot at infantry doing the job. So a Jimmy can go get the snipers that came down with the paratroopers, and bring them to the scene. The snipers preceded by riflemen acting as shield, proceed very carefully on the bridge, swipe the mines, shoot the bunker and kill all enemy units in the trees on the right, supported by the little field guns that are deadly with infantry. Then they close in on the four AT guns to the north, from south and from east.
 |
| To the East of the bridge, fifteen German soldiers are hidden in the trees. |
 |
| To the North of the bridge, four AT guns and eight German soldiers plus an unknown number in the bunker. |
 |
| Bridge has been cleared, all 31 enemy soldiers have been killed, some English rifleman has been wounded but the nearness of the Mobile Hospital has saved his life. |
NORTH-WEST VILLAGE
Along the north-west map edge, there's a tiny village, and twentysix enemies are hidden inside the seven houses but there are no guns or tanks. A couple of Jimmies pass through the place shooting to the enemies in the houses. When the enemy Panzerfaust units have finished ammunition, a tank moves to the crossroads, and when the Jimmies passing reveal the men hidden the houses, the tank kills them. While the village is attacked, enemy bombers will destroy the bridge on the right that leads into the major town. When English soldiers enter the town, another bomber will come in and tear down the two buildings on the right, so all units must be ready to clear the place to avoid losses. When everything is over, four friendly tanks and two troop transports will enter from the map border.
 |
| Jimmies pass through the village, enemy troopers fire Panzerfaust from inside the houses |
 |
| The place is clear, four tanks and two transport trucks have entered the map. |
NORTH VILLAGE
Proceeding to the north, there's another town, with a little hill on the right and a cliff on the left. The snipers advance and clear the left cliff where a heavy machine gun and an AT gun are, then from there they kill the enemies on the little hill, where another heavy machine gun and an AT gun are. Once the way to the town is free, the snipers and a tank move on the little hill, where they can benefit of a vantage point, and tear down the houses from there. But there are three mortars behind town center, so an "improved" Jimmy rushes along the north-west map border, to kill the soldiers managing the mortars. When the enemy runs out of ammunition for Panzerfaust, a tank moves to the crossroads and kills the remaining soldiers in the houses.
 |
North village before the attack: the mortars are out of the picture to the North. |
SOUTH VILLAGE
 |
| The South Village: AA guns, two mortars, tanks and infantry men. |
LAUNCH SITE 1
Near the launch site at the beginning of the scenario, about twenty enemy infantry units are hanging around. Snipers or a fast Jimmy can wipe them out.
EAST VILLAGE
Now it's time to take the east village. It's very big, but poorly defended. There are some infantry units in the houses in the west corner, with some panzerfaust and two AT guns, and a couple of infantry units in the rest of the village. Some tank and infantry can do the task, or reveal enemies with a Jimmy then destroy the infected houses with field guns or mortars.
NORTH EAST VILLAGE
The north east village is smaller but tougher, with tanks, AT guns, AA guns and infantry. Simplest thing is to burn every single house down with field guns, then enter carefully with a line of tanks and some sniper to assure visibility, and kill any remaining unit.
LAUNCH SITE 2
In the meantime other infantry units have retaken the launch site area. This is a sniper job.
PLATEAU
There's a plateau to the north, just in front of the bridge, and it's filled with enemies. Heavy bombing can be the best solution, but somebody will probably remain alive. Kill him.
THE TOWN
It's advisable to advance from the north, where many enemy units are. First, bomb the centre of the town where the germans keep two field guns that can be very dangerous. With a line of a dozen tanks supported by snipers, annihilate everything in front of you: enemies, houses, trees (to have a better line of sight). Bomb the town, destroy every house, then take a fast Willy and rush on the outskirts to locate remaining AT guns (there are three in the trees on the east side). When the outskirts are secure, rush through the centre and kill any remaining unit.
SCORE: 102700
Units destroyed:
infantry 526
tanks 26
artillery 66
vehicles 24
Units lost:
infantry 13
tanks 1
vehicles 1
planes 3
domenica 22 gennaio 2012
ALLIED CAMPAIGN 04 - NORMANDIE
OBJECTIVES:
1 - OCCUPY THE WESTERN BEACH
2 - GAIN CONTROL OF THE HINTERLAND
3 - OCCUPY THE SOUTHERN BEACH
[Now, this is really a monster scenario, the first one in the game, and it's pure pleasure. There are many new units at disposal, and many ways to get the objectives, so I'll tell you mine, which could be very different from yours. There's one very important thing to deal with, it's unit experience, because with experience comes speed, which is vital in the game. Now, there's a trick to gain experience, it's not cheating, no code, it's in the game, but some of you could consider it unfair, and it's shooting our own units. A unit gains experience when it shoots, but it takes a very long time, or when it's shooted, and this way is much faster. So, if you take a vehicle, a tank or a man, and you shoot it and heal/repair it before it is destroyed, you can improve its experience up to the maximum. So take a Willy, place a Jimmy Supply Truck close to it to repair it, and have a rifleman shoot it. Take the Willy to 1000 experience, put two sub machine gunners, one heavy machine gunner and a rifleman on it and you'll have an almost unstoppable killer unit that can infiltrate enemy lines and wreck havoc anywhere. The only way you can lose it is if it finds something on his way that forces it to stop, but as long as you keep it moving, it will be very hard to get it.
Now, we have three beachheads at the start of the scenario. The first thing to do should be to capture the three heavy cannons on the riff just in front of the southernmost one, but in a short time there will be reinforcements coming from the northwest side of the map, and they will head to the hinterland, so to avoid losing units we have to first wipe out the enemy from that area. Take some snipers and shoot at the bunkers using the W key. In this way, the sniper (or rifleman or whatever) will shoot until there's someone inside the bunker/building, and when it's clear, he will stop shooting. But please note that if the bunker/building is empty, the sniper will go on shooting indefinitely. When some of the buildings in the north area will be cleared, take an experienced Willy and rush through the enemy positions, firing and killing the remaining units. When the vehicle is damaged or bullets have run out, take the Willy to a Jimmy Supply Truck and have it repaired/reloaded. Now, with the same tactic, you can take the field guns on the southern riff, and once you have them, combining snipers fire, Willy's rushes and long range fire, nothing can stop you until the end of the scenario.]


BUNKERS
FIELD GUNS
NORTH VILLAGE

THE FOREST AND THE TREES
THE BRIDGE
THE LAST VILLAGE The last village to conquer is hard to get, as there are ten tanks of various types and enemy soldiers in almost every house. So, to make things easier, artillery pounds hard and destroys all buildings, hoping in the process to hit some of the tanks. At a certain point, the tanks will leave the village and join the field guns just to the west.
THE FINAL ATTACK
1 - OCCUPY THE WESTERN BEACH
2 - GAIN CONTROL OF THE HINTERLAND
3 - OCCUPY THE SOUTHERN BEACH
[Now, this is really a monster scenario, the first one in the game, and it's pure pleasure. There are many new units at disposal, and many ways to get the objectives, so I'll tell you mine, which could be very different from yours. There's one very important thing to deal with, it's unit experience, because with experience comes speed, which is vital in the game. Now, there's a trick to gain experience, it's not cheating, no code, it's in the game, but some of you could consider it unfair, and it's shooting our own units. A unit gains experience when it shoots, but it takes a very long time, or when it's shooted, and this way is much faster. So, if you take a vehicle, a tank or a man, and you shoot it and heal/repair it before it is destroyed, you can improve its experience up to the maximum. So take a Willy, place a Jimmy Supply Truck close to it to repair it, and have a rifleman shoot it. Take the Willy to 1000 experience, put two sub machine gunners, one heavy machine gunner and a rifleman on it and you'll have an almost unstoppable killer unit that can infiltrate enemy lines and wreck havoc anywhere. The only way you can lose it is if it finds something on his way that forces it to stop, but as long as you keep it moving, it will be very hard to get it.
Now, we have three beachheads at the start of the scenario. The first thing to do should be to capture the three heavy cannons on the riff just in front of the southernmost one, but in a short time there will be reinforcements coming from the northwest side of the map, and they will head to the hinterland, so to avoid losing units we have to first wipe out the enemy from that area. Take some snipers and shoot at the bunkers using the W key. In this way, the sniper (or rifleman or whatever) will shoot until there's someone inside the bunker/building, and when it's clear, he will stop shooting. But please note that if the bunker/building is empty, the sniper will go on shooting indefinitely. When some of the buildings in the north area will be cleared, take an experienced Willy and rush through the enemy positions, firing and killing the remaining units. When the vehicle is damaged or bullets have run out, take the Willy to a Jimmy Supply Truck and have it repaired/reloaded. Now, with the same tactic, you can take the field guns on the southern riff, and once you have them, combining snipers fire, Willy's rushes and long range fire, nothing can stop you until the end of the scenario.]
That was true with the first edition, now with the Gold Edition, experience means much less, and Willies at 1000 experience can be stopped by anybody. So everything becomes harder.
THE THREE HOWITZERS
At the very beginning, the three southernmost snipers advance and take advantage of the recon aircraft flying over the riff where the artillery and the mortars are to destroy the Maultier supply truck and kill two officers which are running to enter the bunkers that overlook the beach.
 |
| The Maultier supply truck is hit by the three snipers on the beach |
NORTH BEACH
First thing to do is make room for the reinforcements which will enter from the northwest side of the map and will head to the forest. Willies are now only good to draw fire from a certain distance, so a single Stuart tank is enough to attack and break through the first line, as there is no antitank or Panzerfaust. Then come the snipers, which eliminate all the enemy units manning the many antitank guns forming the second line.


 |
| Snipers slowly advance and kill all German soldiers manning antitank guns |
BUNKERS
Time to take the five bunkers on the beach from the north, as allied reinforcements keep entering the scenario and move very near the enemy on the fringe of the forest. Snipers kill enemies inside the bunkers, while tanks destroy the barn, as for unknown reasons snipers' fire has no effect on infantry inside the barn. Anyway, it's always better to keep an eye on fresh units entering the map, and move them to a safe position.

FIELD GUNS
Once room has been made for fresh units to enter, it's time to take the three field guns on the plateau. Some snipers shoot the bunkers, houses and tower to kill everyone inside. The barn must be hit by a nearby gun, as snipers fire is ineffective against it. Once all hidden enemies have been eliminated, a Willy rushes to where field guns and mortars are, killing the soldiers manning them. Otherwise, it's possible to send a soldier up through a passage in the riff, the guy will be killed my mortars fire, but it will be enough for snipers in a safe position to kill enemy soldiers operating the mortars. Once the plateau is clear, snipers will come and from a vantage position they will kill two anti-tank crews to the north and to the east. So, three field guns, two mortars and two anti-tank guns have been captured.

NORTH VILLAGE
Allied soldiers have been parachuted in the far north corner of the map. Some of them, with an officer, move to the ledge overlooking the village. Some tanks move to the spot, ready to shoot at enemies patrolling the streets when they enter their fire range. Blood will flow. An allied soldier moves to the west corner of the ledge to keep an eye on a Tiger tank that sooner or later will come from north-west.

LITTLE HOUSE ON THE PRAIRIE
Just north of the plateau where the big guns have been captured, there's a lonely house defended by three bunkers, a barn and two anti-tank guns. The newly-captured field guns take out the barn, while the snipers can do the rest, shooting the bunkers and advancing slowly to spot the guns and kill the crews.
Just north of the plateau where the big guns have been captured, there's a lonely house defended by three bunkers, a barn and two anti-tank guns. The newly-captured field guns take out the barn, while the snipers can do the rest, shooting the bunkers and advancing slowly to spot the guns and kill the crews.

THE FOREST AND THE TREES
Now it's time to free a large forest area in which six mortars and many tanks are, the most deadly of these is a Nebelwerfer. Two strong positions and some Willies which rush through the trees to spot the enemy units and the three big guns nearby to hit them.
 |
| West border: a sniper and two anti-tank guns. |
 |
| South border: an officer in the bunker, six anti-tank guns, three snipers and three big guns. |
THE BRIDGE
Now it's time to cross the bridge. On the North bank usually there are five enemy soldiers walking around, and two, seven and four lurking in the buildings, for a total of 18 German soldiers, plus 2 SdKfz anti-aircraft units. The matter is simply solved: first a Stuart rushes in the middle of the enemy destroying the SdKfz's, then a Willy rushes around, killing the men hidden in the buildings.
 |
| North bank before the attack |
 |
| North bank after the attack. |
Same situation on the South bank: five plus four men in the buildings and five Sd.Kfz.'s patrolling the place. First the Stuart rush, then the Willy, and the place is clear.
 |
| South bank before the attack |
 |
| South bank after the attack |
THE LAST VILLAGE


 |
| German tanks are eliminated and three field guns have been captured |
THE FINAL ATTACK
The remaining enemy units are scattered in the woods: six mortars, four AT guns and twelve soldiers. Artillery softens defenses and an advancing sniper spots the remaining enemies which are killed by the sniper himself or by field guns.


martedì 10 gennaio 2012
ALLIED CAMPAIGN 03 - THE BRIDGE

At the beginning of the scenario there are 24 american riflemen and 3 officers in the same map and location of the previous scenario with french commandos.
Enemy is scattered on the map in seven platoons.
 |
| 1° Platoon is in the south corner of the map: four Sdkfz 250/9 Greif, four Sdkfz 231, four Sdkfz 7/1 Anti Aircraft and some infantry. |
 |
| 2° Platoon is guarding the access to the first bridge, thirteen men plus some in the bunker, and three unmanned Pumas |
 |
| 3° Platoon is on the other side of the river, 11 infantry units. |
 |
| 4° Platoon is on the outskirts of main village, center map, 26 infantry units. |
 |
| 5° Platoon is made of 7 armor units: three Sdkfz 231, two Panzer II Luchs and two Panzer IV F, east of the main village. |
 |
| 6° Platoon is made of 4 Granatwerfer 34, 4 Pak 38L/60 anti-tank and 29 infantry units. |
The 7° Platoon is made of some men hidden in the bunker and in two houses of the northernmost village.
The first thing to do, and it's absolutely vital, is to lay down as many mines as possible, just where the riflemen are, because when enemy 2° Platoon will be attacked, eight armored vehicles from 1° Platoon will move to guard the bridge, and if they're not stopped, American soldiers are doomed. So, pause the game, select every man and assign him to lay a mine, and after it's done, pause again and repeat the operation for the second mine. This is a must do.
 |
| This is where to lay the mines, the little white dots. |
Now, American soldiers advance with great caution to the north, placing the riflemen in a line with the officers just behind them, to easily spot the enemy. As soon as the first german soldier will be shot, a siren will blow and the enemies will come to look for the enemy. If the American soldiers are well placed, the firepower will stop the Germans from getting too near, and it should end up with just some wounded man.
 |
| An officer and five riflemen made all this bloodshed |
In the meantime, German tanks arrive but are all destroyed by the mines placed at the beginning.
 |
| American soldiers watch as German tanks explode and burn. |
As soon as the enemies are wiped out, at least six riflemen rush to the bridge, where they'll find three unmanned Pumas APC and take control of them.
 |
| American soldiers rush to capture APC |
Once Pumas are captured, Americans can send the tanks to destroy the rest of enemy 1° Platoon in the south corner, to get points, otherwise let them be, as this is non-influent to finish the scenario. Americans now attack 3° Platoon on the other side of the river, then cross the bridge with infantry units.
 |
| Firing squad eliminates all eleven Germans of 3° Platoon |
When all the units have crossed the bridge, Pumas destroy it and the first objective is reached.
 |
| Once all units have crossed the bridge, APC destroy it. |
In the meantime, five planes are launching paratroopers along the north-east side of the map: 5 officers, 10 heavy machine gunners and 45 riflemen. As soon as Americans have crossed the bridge, 4° Platoon will come from the north. An officer goes on the turret with <HOLD FIRE> button marked on the control panel, so it's possible to see the enemy without being seen. A Puma can easily eliminate enemies one by one, keeping at a certain distance.
 |
| Just one Puma goes back and forth and kills all German troops. |
When it's over, it's time to cross the second bridge, but it won't be an easy task. Platoons 5, 6 and 7 are still on the map, and they all must be destroyed.
It's easy to get rid of the seven tanks of 5th Platoon. The main village is clear. American riflemen lay mines all over the streets, not just mail street, then enter the houses and hold fire.
 |
| All streets of main village are mined |
Now it's time to attack 6 Platoon, the hardest task of the scenario. Mortars are the most dangerous threat, and it's just a matter of position. This is how to attack them.
 |
| American riflemen have just killed German units managing the mortars |
Now it's anti-tank guns turn. This is how to kill the men managing the first from the right.
 |
| An officer and three rifleman are enough to kill the Germans managing the first anti-tank gun. |
Then the first from the left.
 |
| This is how to get rid of the second anti-tank gun. |
During the attack, at a certain point the seven tanks of 5th Platoon will cross the main village to guard the last bridge. They will find death in the streets.
 |
| German tanks exploding as they cross the streets of main village. |
American riflemen proceed and attack the remaining enemies.
 |
| Americans attack the remaining units of 6th Platoon |
| The area has been cleared, American units can now cross the bridge. |
Before crossing the bridge, shoot the enemies inside the bunker.
 |
| Four American riflemen shoot the enemies inside the bunker. |
Now, freeing the village is very simple. The enemy is in two houses: the last one on the left along the main road, the light blue one, and the big one just in front of it. If you want to do it big, there are four mortars in a meadow just left of the road, you can use them to destroy the houses.
 |
| Captured mortars destroy houses where the enemy is hiding. |
To finish the scenario, the bridge must be destroyed, it's not in the objectives but it must be done to proceed to next scenario.
 |
| Victory - End of scenario. |

Iscriviti a:
Commenti (Atom)